
It’s been a bubbles in the fountain kind of week over here friend.

To the local who poured bubble bath into the fountain in front of the courthouse, smack dab in the center of our downtown Main Street of Bel Air…can I just say…
Thank you.
It’s probably not allowed.
It’s probably frowned upon by some.
It’s probably breaking some kind of law.
But?
This little scene made me smile and might I say giggle as I drove past it from picking up our oldest daughter from her middle school intramural sports.
It made us both giggle so much so, that we had to snap that shot above.
It’s the little things lately isn’t it?
That we need to be sure to hold space for.
Because if we miss the small stuff…we miss the good stuff.
So?
Catch that fleeting smile within our reach and wear it proudly and let that unexpected giggle ride it’s wave of runway…because it’s that small stuff, that is carrying us through the big stuff right now.
Speaking of things bubbling over….
I am bubbling over with excitement to share with you my now favorite of all time, super simple, thrift store make over that turned out BETTER than I could have ever imagined!
Yes friend, I am THAT excited.
You see, our oldest daughter, Eve, who was in the car with me when we stumbled upon the bubbling fountain, well that middle schooler of mine arrives home earlier than her two younger sisters from school these days.
And so?
Once per week we have made it “our thing” to hop in the car and ride over to our local Goodwill store to see what seasonal goodies might be there that we can refresh and turn into Fall or Halloween decor.
And that’s when it happened.
One minute I was eyeing plastic pumpkins considering a spray paint makeover and the next minute I spotted this.

And that my friend is when the wheels started spinning in my head.
Because you see, as a home decorator with my Home with Heather interior styling business, it’s literally my job to shop for my clients.
And?
As I have been shopping online and in person for the last several months now…I have noticed a trend.
A trend to the tune of $249-$399 terra cotta table lamps.
These lamps are making a HUGE splash in the home decor space right now.
These ceramic table lamps offer a worn, old-age, rustic vibe with a modern twist, often mixing moody colors to create an aged concrete look.
I spotted this lamp and immediately recalled these Pottery Barn table lamps that retail on the PB website right now for $249-$349.

Also these Pottery Barn Miller Table Lamps that retail for $299-$399.

Here is another example of this terra cotta trend in table lamps.
This Lorenzo Lamp from Ballard Designs that is “on sale” now for $241-$271.

You get the picture.
So?
When I spotted this lonesome lamp with the price tag of $10?

I spotted POTENTIAL.
Like in the movie “Clueless,” when Alicia Silverstone spots Brittany Murphy as Tai for the first time and her eyes widen and she suggests…
“Let’s do a makeover”
Yes…little lamp of mine…as the song goes...”I’m going to let you shine.”
And away we went, giggles and lamp in tow along with Halloween decor for my eager to decorate her room and make it “spooky” middle schooler.

Here’s the thing.
Once I had this little lamp of mine home and I wanted to make her shine, make her shine…I had to determine my tactical approach.
But?
Every time I researched the popular “mud-painting” DIY trend or any thrift store lamp makeover…I found a ton of information, posts and tutorials.
But there was one problem.
They all seemed complicated, confusing and daunting.
Let’s face it…painting with actual mud, well that didn’t really sound attractive to me.
So?
I stepped away from all those literally, clear as mud tutorials and came up with this super simple 3 step process for a textured, painted lamp.
In this blog post, I am going to give you very simple steps on how to take a thrift store lamp and turn it into an eat your heart out Pottery Barn worthy masterpiece, so that you too can replicate this look.
Even better?
No mud involved!
(Hurry – I hear there has been a run on table lamps at the thrift stores since the publishing of this blog post. 🙂
All kidding aside…you are going to want to do this DIY thrift store lamp makeover yourself because it is THAT easy and THAT amazing.
Are you ready to see the before and after and then I will give you the simple steps to do it yourself?
It’s reveal time!
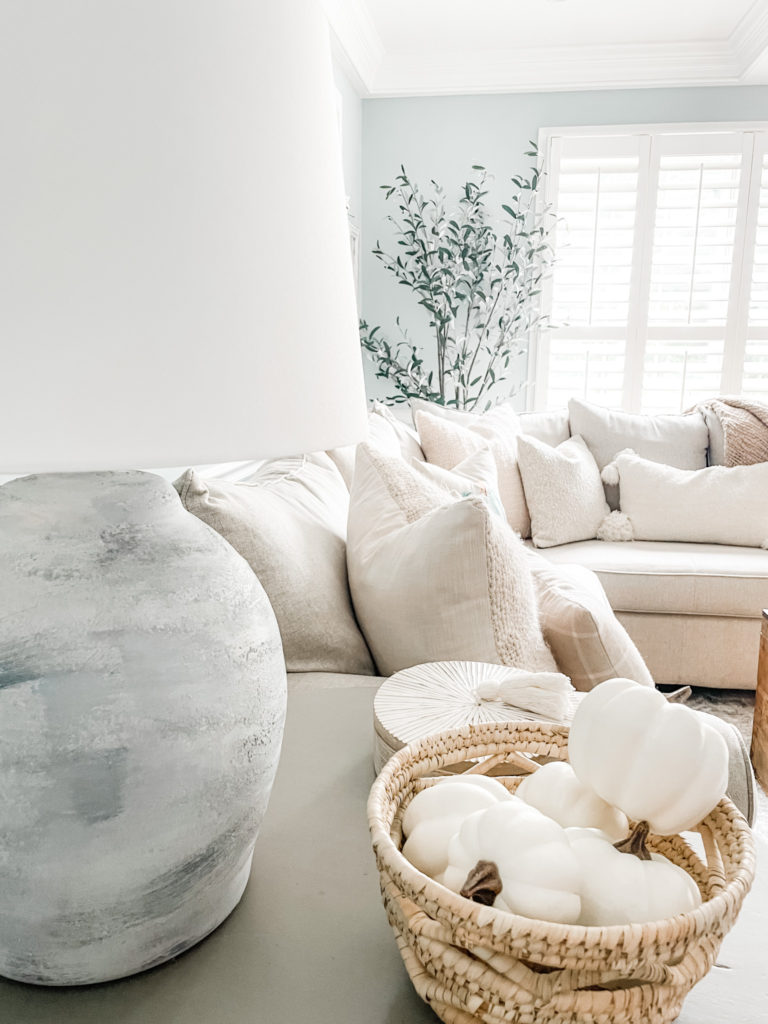
Here is the lamp before her makeover.

Here is the lamp AFTER her super simple makeover!

I know right?
Can you even believe it?
Honestly, at night when I sit down on the sofa to downshift…I just stare at her.
Here is a side by side comparison just for fun

Now do you see why I was bubbling over with excitement and joy like our little Main Street fountain this week?
Ok now here is where it gets good, so lean in friend.
I’m about to break down the very simple steps I took to take this little lamp of mine and let her shine, let her shine, let her shine.
Follow me.
Step 1
Remove the shade, tape the neck of the lamp with painters tape and give it a base coat of spray paint.


I used this spray paint from Target.
The wonderful thing about this DIY painted lamp project is that when you are spray painting the base layer of paint, you do not need to stress about the paint running or drip marks because we are going for a textured look overall and I painted over the drips with the next paint steps.
*Be sure to let the spray paint base coat completely dry before moving on to the next paint step.
Step 2
Mix the main paint color, with 2 tablespoons of baking soda and 1 tablespoon of salt and apply it to the lamp with a foam paint brush.

In the picture above, I have poured a small amount of paint (color is Gray Screen by Sherwin Williams) into a plastic bowl. I have already poured 2 tablespoons of baking soda on top of the paint and now I am pouring in the 1 tablespoon of salt.
The salt is added to help achieve the gritty texture that the terra cotta lamps have. The thrift store lamp that I purchased did not have any texture to it.
Mix the paint, baking soda and salt mixture together with a foam paint brush and begin painting!


Here is the first brush stroke of the gritty paint mixture.


Paint the lamp all over to your liking!

*Noteworthy tip:
The mixture does become dry and crumbly rather quickly.
Don’t be alarmed!
Just keep going, adding paint strokes until you have arrived to a place that you feel good about!

Now it’s time to let your main coat of paint dry. (My main paint dried within 45 minutes in the sun.)

Step 3
Add 2 more paint colors of your choice to give the lamp the look of aged texture and dimension using a dry brush technique.
Sounds complicated – super simple 🙂

I used paint colors that I already had on hand from recent home projects.
The three paint colors I used to paint the lamp are:
Gray Screen by Sherwin Williams.
(Gray Screen is the main paint color that I mixed with baking soda and salt and applied with foam brush, after the spray paint base. I had Gray Screen paint left over from painting our master bathroom cabinets last year. You can see the before and after of our painted cabinets and bathroom refresh here in this post.)
Krypton by Sherwin Williams.
(Krypton was left over from the coastal bedroom makeover I did for Eve last Spring. You can see the makeover here in this post.)
Tricorn Black by Sherwin Williams.
(Tricorn Black was left over from my very recent project of painting our front door and the front door trim. You can see the painted front door before & after and the major update it gave to the exterior of our home here in this post.
Once the main coat of Gray Screen, mixed with the baking soda and salt had dried, I began to layer the paint with Krypton and Tricorn Black by using a dry brush technique.

To dry brush the lamp:
I poured small amounts of each accent color onto a paper plate, dipped my brush into the first accent paint color (Tricorn Black) and wiped most of the paint off with a paper towel.
Then I very gently brushed the dry paint bristles onto the lamp.

EASY friends.
This was SO EASY.
I continued to dry brush my two accent colors all over the lamp to give it that aged appearance that is key to offer the lamp that little bit of depth and interest.


Lastly, I used the foam paint brush and the original paint mixture of Gray Screen, baking soda and salt to gently go over the lamp one last time to blend the colors until I was satisfied with the overall paint makeover.

And then?
I let her sit in the sun in all her painted glory to dry.

Can you even believe it?
No mud, no sanding, no complicated tutorial.
Just three paint colors I had on hand.
Two paint brushes.
A little baking soda and salt.
And?
We are Pottery Barn worthy friend.
Let’s flip back to where we started when we first met this little light of mine.

Ten buckaroos and a new crisp shade later and she is ready for center stage.

(side note – I could have continued to use the original shade as conical shades are back in again. However, I decided I wanted a crisp white shade so I replaced it with this shade from Target.)
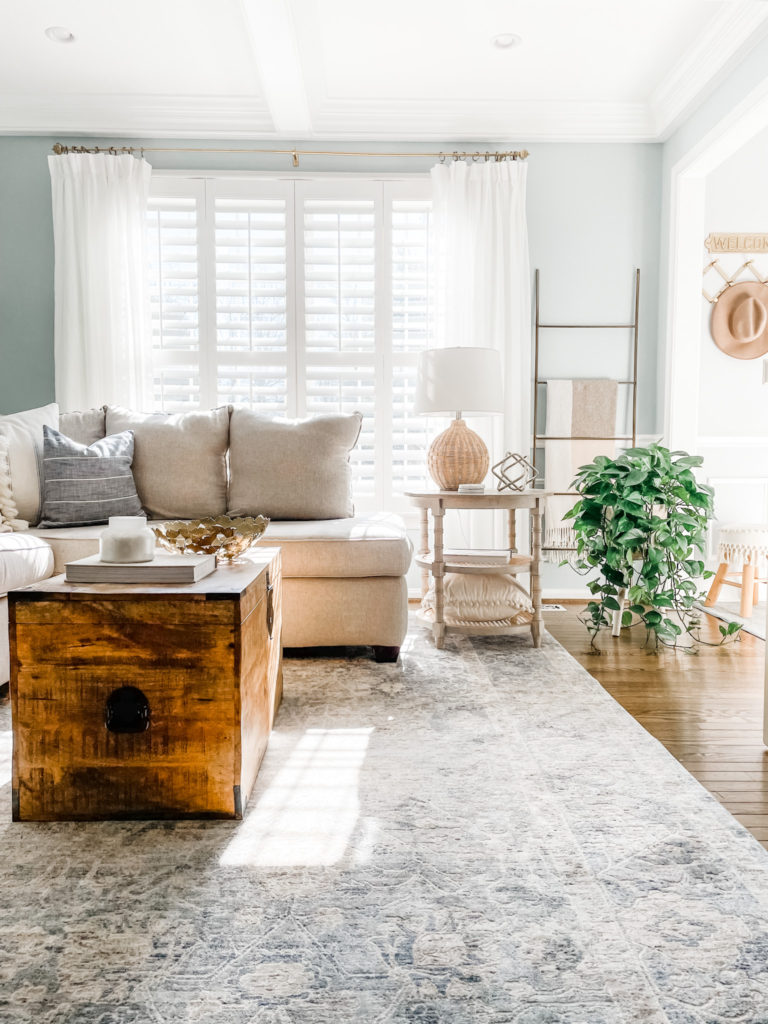
Do you want to see where she sits now?
Yay!
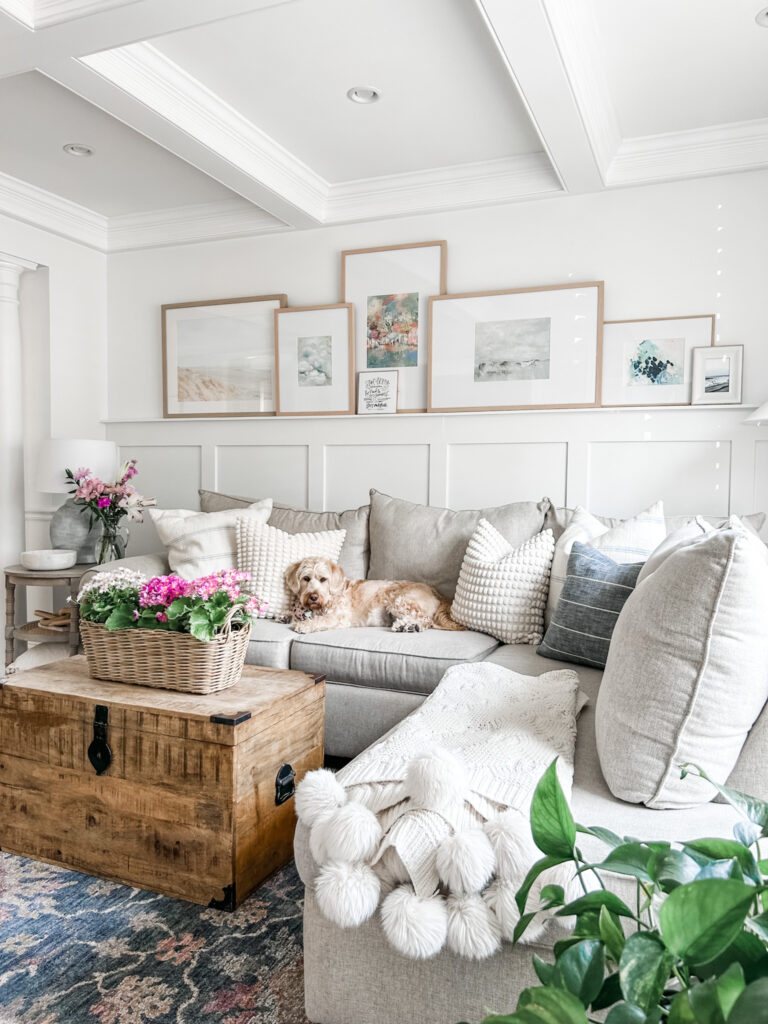
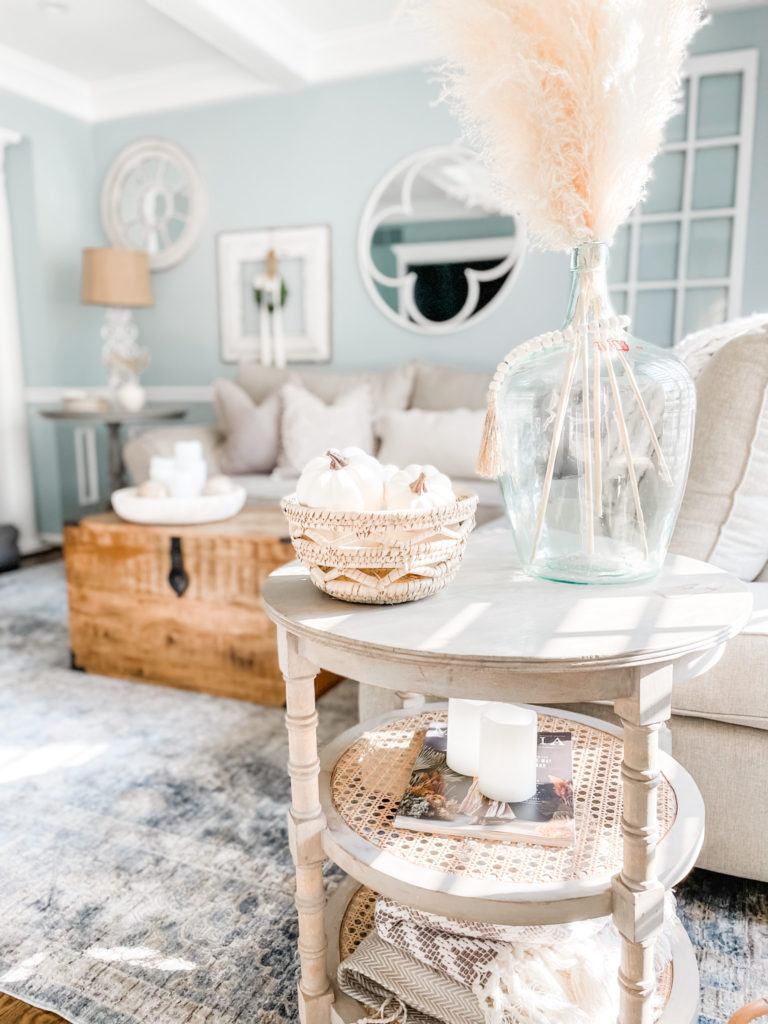
She is the finishing touch to our refreshed family room that I shared in last week’s blog post, with all the details and product sources to in this post.

What do you think friend?
Meant to be?
I think so.


I think it’s safe to say that..
(cue the nursery school music)
“this little light of mine…I’m going to let it shine, let it shine, let it shine…”

Friend, I am not sure what kind of week you are just wapping up.
I am going to go out on a limb and say maybe you were tested this week.
Maybe you were pushed to your limits.
Maybe someone gave one of your kids a hard time.
Maybe you felt totally and completed wiped out.
Maybe you had a long list of to do’s and it morphed into a list of “un-done’s.”
Maybe you lost your temper.
Maybe you miss someone.
Maybe you are not feeling like yourself.
Can I just remind you?
That maybe…
Maybe you are human.
Maybe when we accept that little fact…we can also accept that things can be a little less tidy…and still be O.K.
A little less all wrapped up in a perfect bow.
Because, guess what?
We are human…but God is not.
Friends, God is closer to us, than we are to ourselves.
He understands us, more than we understand ourselves.
And so?
It’s Ok to dare to be human.
As my favorite speaker and author, Lysa TerKeurst says:
“Our job is to be obedient and God’s job is everything else.”
It’s OK to be vulnerable.
Because we have a God that is LIGHT.
He knows every intricacy about every darkness that threatens our light.
He is already working inside the electrical chambers of our hearts to lighten the burden of the challenges we face and illuminate our paths forward every step of the way out to the other side.
“Your word is a lamp to guide my feet and a light for my path.”
psalm 119″105 NLT
I don’t know how it works, but I do know that the more time I spend in God’s Word, the more likely I am to find the shortest distance to the atmosphere of light and peace that I seek.
Deep breath in.
Deep breath out.
Grace in.
Praise out.
Let your light shine friend…
Dear God,
Thank You that You are good and that You are good at being God.
Thank You for the way You offer to lighten our burdens if we are willing to bring them to You.
Help me to remember to embrace Your grace and let Your light shine.
Amen.
Living on a prayer,
Heather
Shop This Post:

*Affiliate Links are used in this post at no additional cost to you.

Love this updo and I think I have a ‘vintage’ lamp that will be perfect!
Thanks so much- I think I can help you with your own lamp makeover 🙂
Love the lamp makeover – I do love those PB lamps. Thanks for the easy tutorial. I plan to use it!!
The end of your blog brought tears. Needed that encouragement.🙂
Hi Patty! Glad you loved the lamp makeover!! You can easily do this too!! It is super fun and rewarding. Also, thanks for sharing that you enjoyed the end of the blog post as well. I am glad the words helped your heart when you needed it. XO, Heather
This is fantastic!!! What a great creation! Best trash to treasure! Great job! Also thanks for the reminder that God has it all together!!!
Hi Diane! Thank you so much!! I am so glad you love the lamp makeover as much as I do!! I am so pleased with how it turned out! And AMEN to God holding all of our pieces together!! Thanks for being here! XO, Heather
Love the lamp fun
Thank you Melinda! I am glad you love it too! It was so fun to do!! Looking forward to seeing you in a few weeks! XO, Heather